QuickBooks Odoo Connector
This connector will help odoo users to:
- Synchronize the list of customers between odoo and quickbooks.
- Synchronize invoices between odoo and quickbooks.
- Use the odoo interface to ask quickbooks to send an invoice to the customer.
- Use the odoo server to automatically send a confirmation email after the customer has made quickbooks payment.
Configuration :
After installing this module, you will see the record of "Quickbooks" in the list of payment methods.
From there, you can configure the connectivity between odoo and Quickbooks.

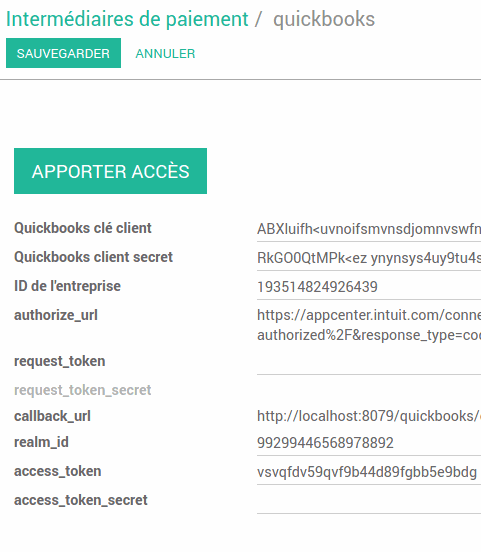
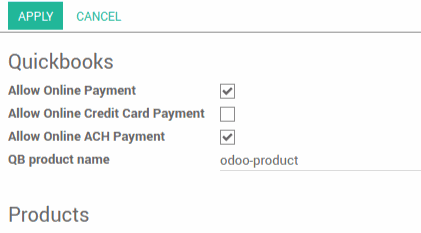
Go to the sales settings and choose the configuration you want to use.
Create Customer:
Go to the Customers sub menu under the Sale menu and create a new customer.
Click on add to quickbooks to add the created customer to your Quickbooks .
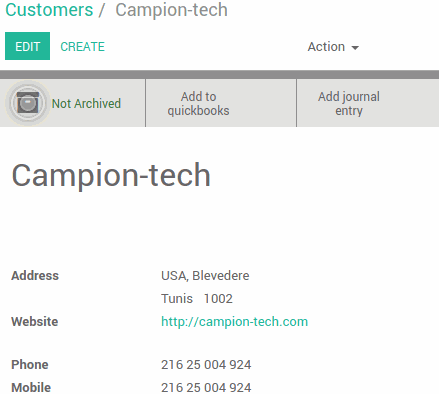
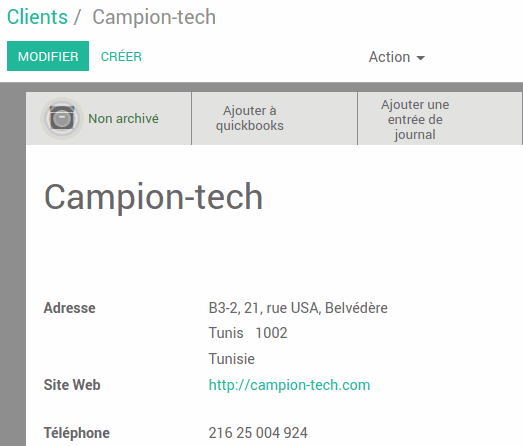
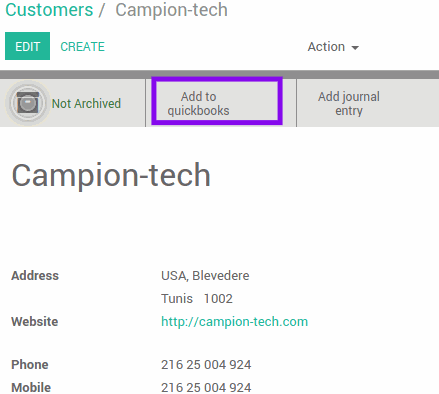
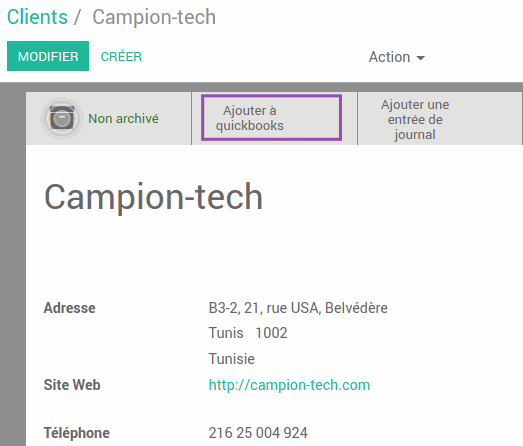
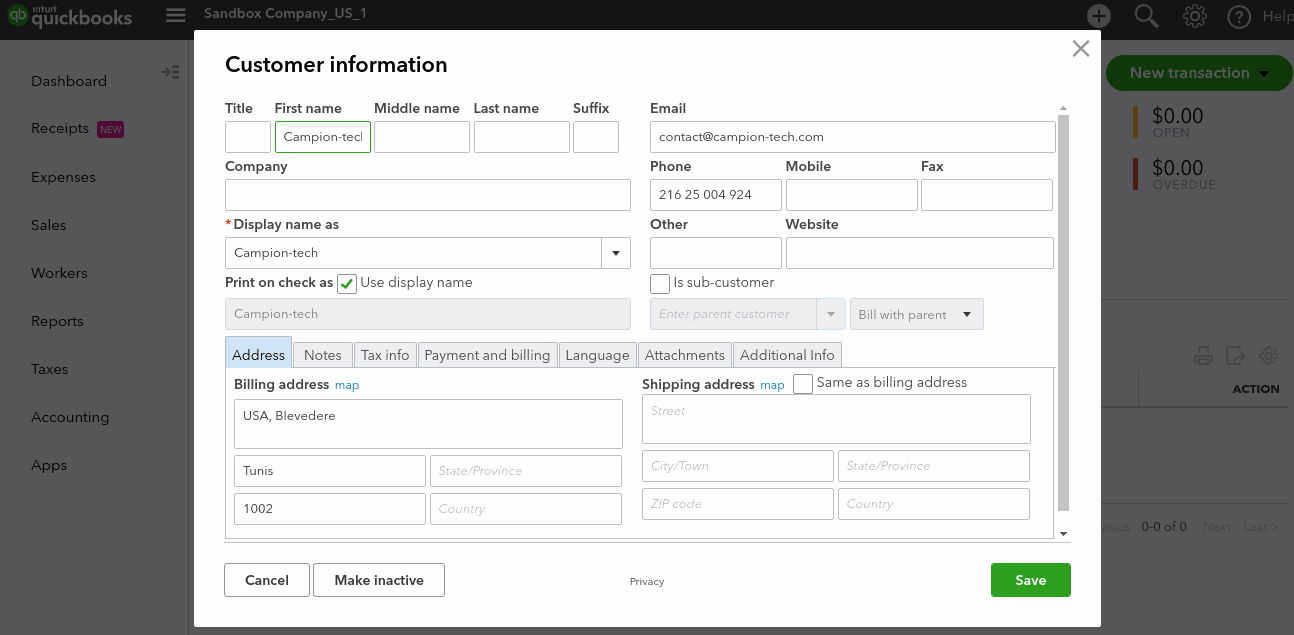
Go to QuickBooks to see the created customer from odoo added to the liste customers in Quickbooks.
Create Sale order:
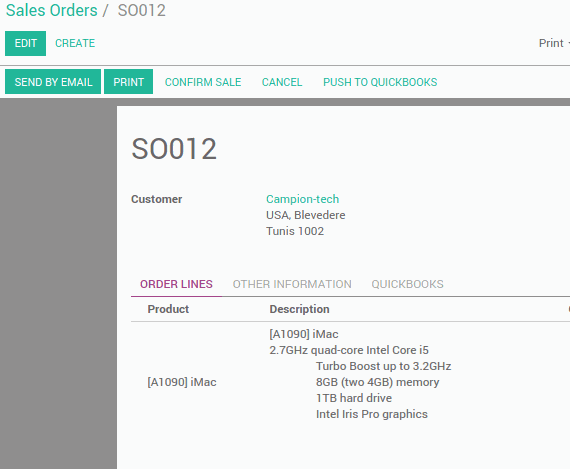
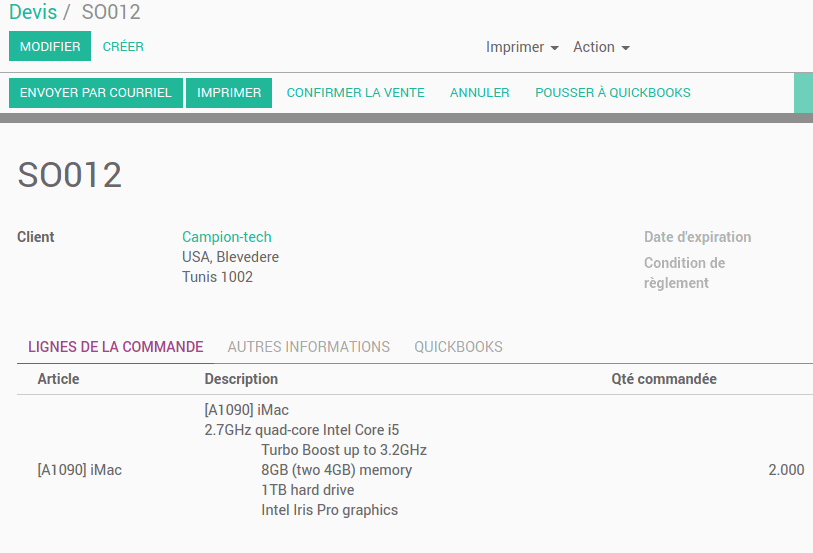
Go Back to Odoo and create a sale order to the created customer.
Click on the tab Quickbooks and add the QB tax (because quickbook accepte one tax for all the line in the sale order) .
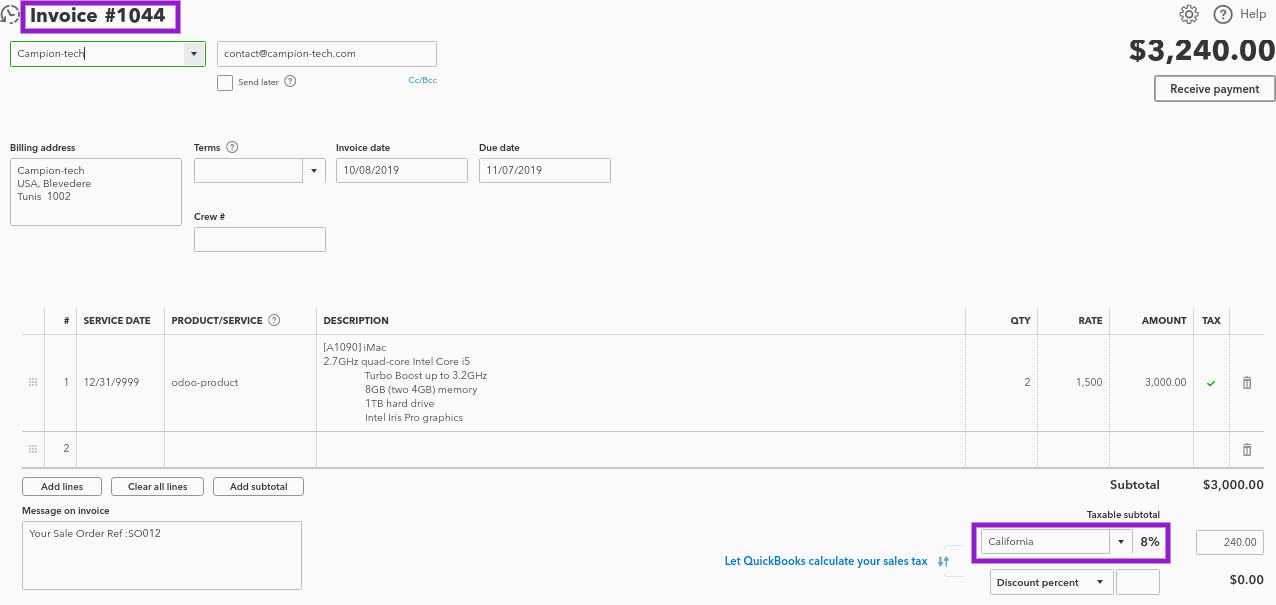
Click the "Push to Quickbooks" button to generate an invoice from this order in your Quickbooks account. Quickbooks will generate a number for this new invoice, and odoo will save it in the "QB Invoice Number" field.
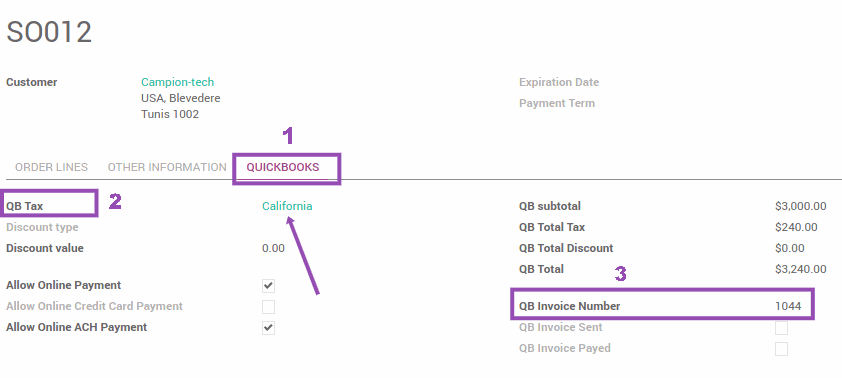
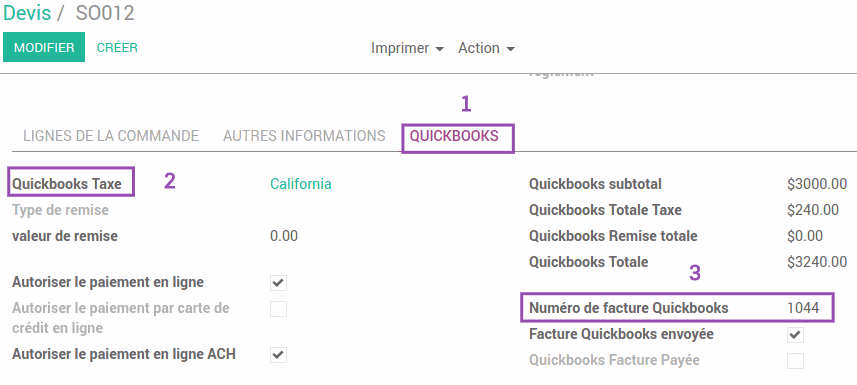
Now Go to QuickBooks to see the created sale order from odoo added to the liste of invoices in Quickbooks. Find it using the value of the field "QB Invoice Number".
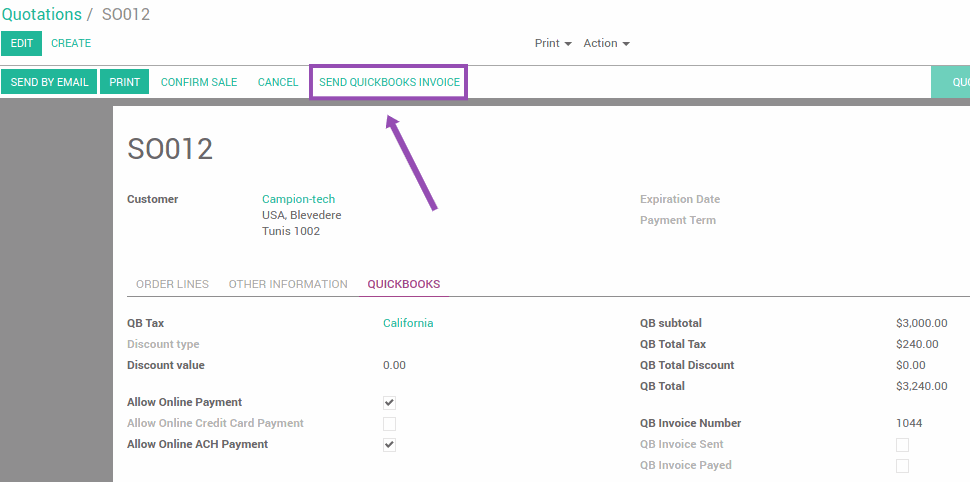
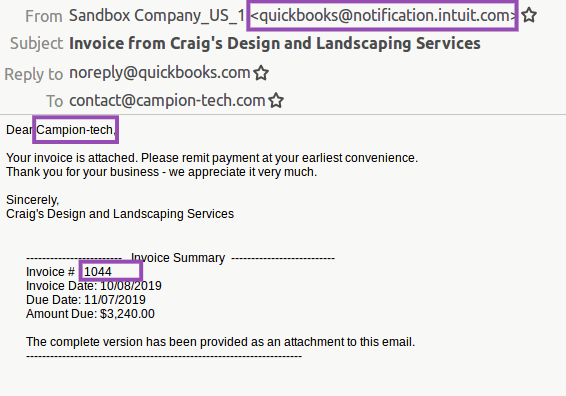
Send Quickbooks invoice:
When you want to send invoice to customer for payment you can click on Send Quickbooks invoice , in this case odoo notify Quickbook to send mail to this client from his server.
The mail received by the client from Quickbooks will be of this form.
When the customer pays his invoice, Quickbooks informs the odoo server that this invoice is paid. When Odoo receives this notification, it sends an email to the customer to inform him that his order is confirmed and being processed.