Automate Shipping
The automate shipping module offers the possibility of preparing several deliveries for several customers. We have developed the module with this option, to facilitate the delivery of several customers who have close geolocations and can be served in the same operation.
We will not put all the details of this project to avoid this document becomes too long.
Introduction:
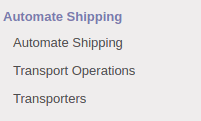
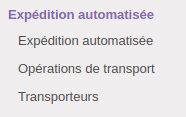
After installing this module, a menu named "Automate Shipping" will be added under the main warehouse menu, and it has three submenus:
- The first menu is “Automate Shipping”. It contains all "Delivery orders" and "Reception orders" wich are in "Ready to tranfer" or "partially available" states.
They are grouped by contact (customer or supplier) or by State. - The second menu is “Transport Operations” which contains all transport operations created grouped by state.
"Transport Operations" is a group of deliveries and / or receptions that has a close geographical location, so that they can be performed in a single operation. - The last menu is “Transporters” shows the list of transporters.
The idea is a list of “Automate Shipping” will be grouped into a “Transport Operation” and will be transferred by a selected "Transporter".
To learn more about this module, we will give you a step-by-step example of the whole process.
Configuration:
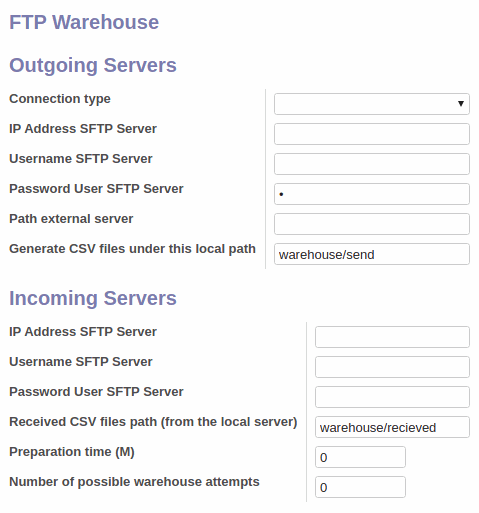
In the case of our customer for whom we have developed this application, the warehouse service uses its own application. Communication with this application is done by sending and receiving csv files on an FTP /SFTP server. To give Odoo the ability to communicate with this application, we need to configure the FTP /SFTP server. The same for Transporters.
- Warehouse :
Go to settings -> configuration -> warehouse.
Fill in the data fields of the warehouse FTP/SFTP server.

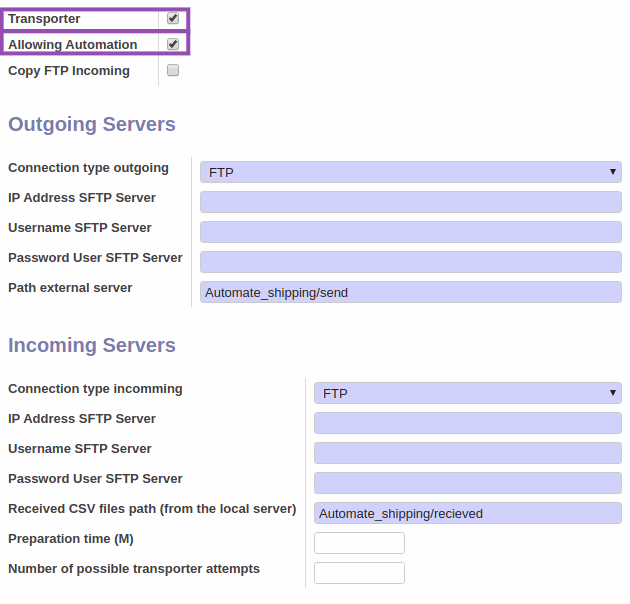
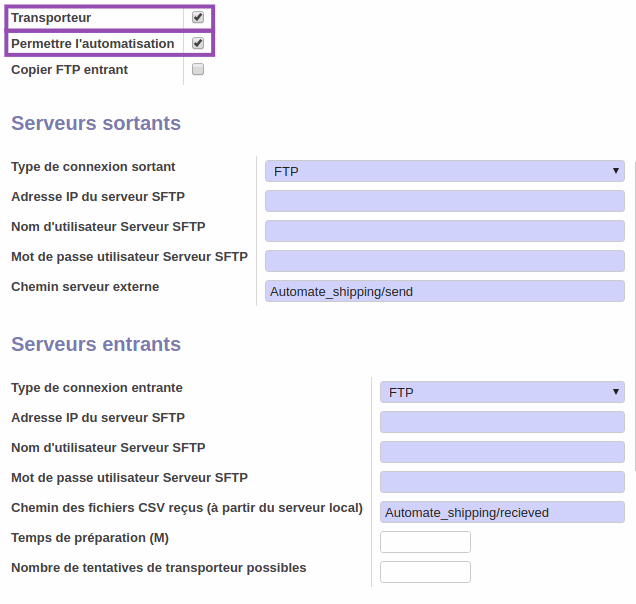
- Transporter:
- Allez à l'entrepôt -> Expédition automatisée -> Transporteurs.
- Create a new transporter.
- Go to the tab transporter and Check the two selection fields "Transporter" , "Allowing Automation".
- Fill in the data fields of the transporter FTP/SFTP server.
Demonstration:
- Create a new "Transport operation":
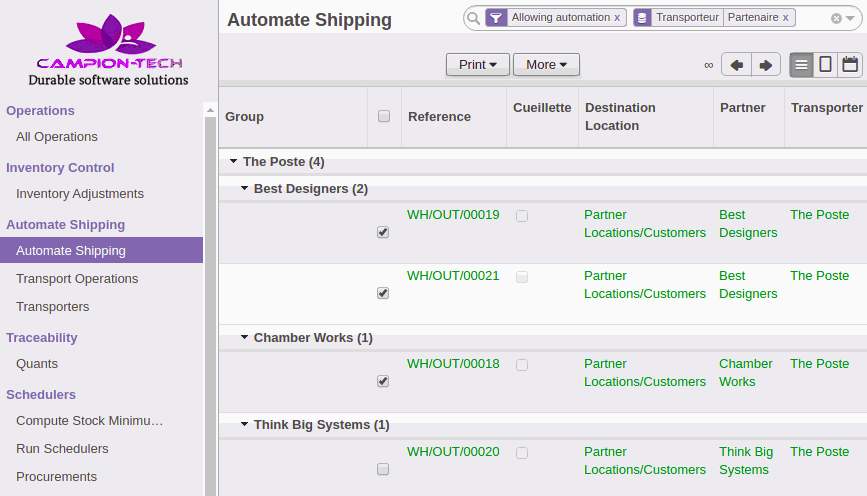
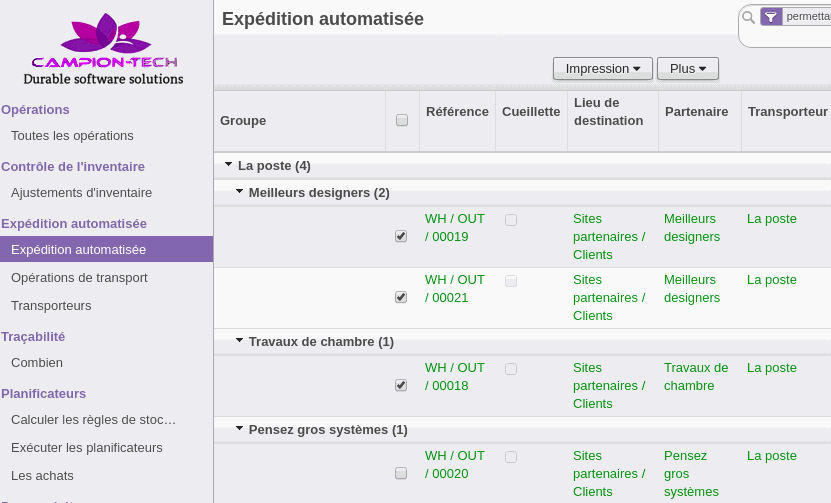
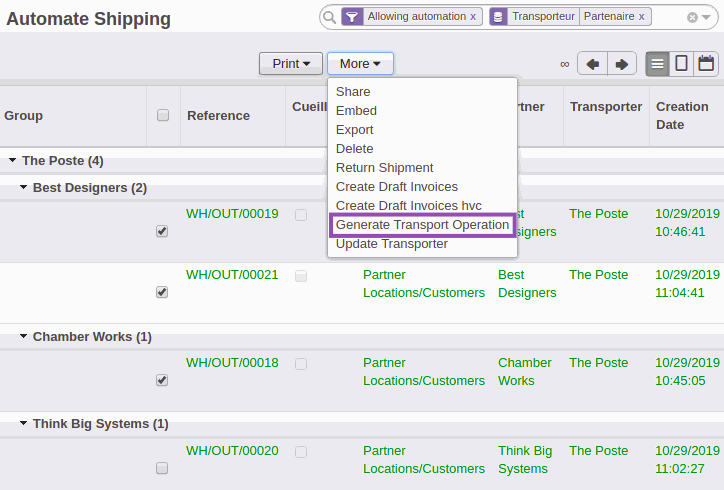
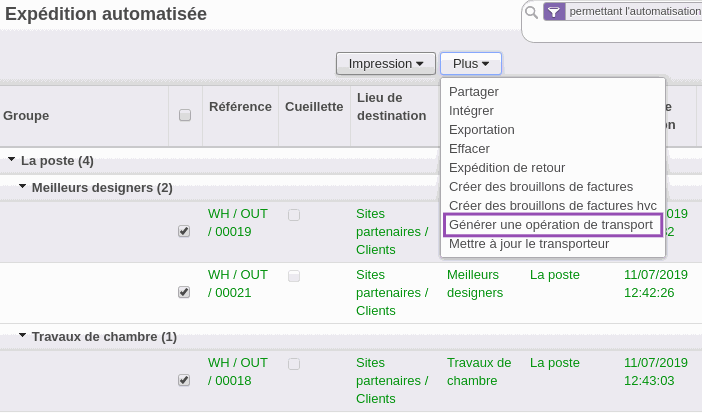
- Allez dans le sous-menu "Expédition automatisée" qui contient toutes les livraisons
- Select the delivery lines that you want to group in one operation (you are not allowed to add lines that are in the state waiting or draft).
- Select "Generate Transport Operation" option.
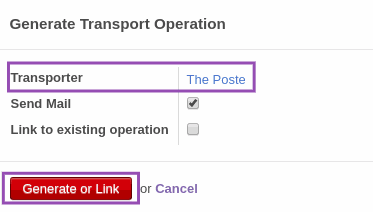
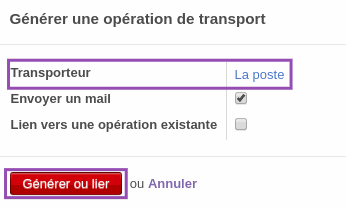
- Choose the transporter.
- Click on "Generate or Link" button.
- Note: You can add the selected delivery lines to an operation already created, by checking the box "Link to existing operation".
- The system generates a new operation in the state Draft and adds this operation to the list under the menu "Transport Operations".
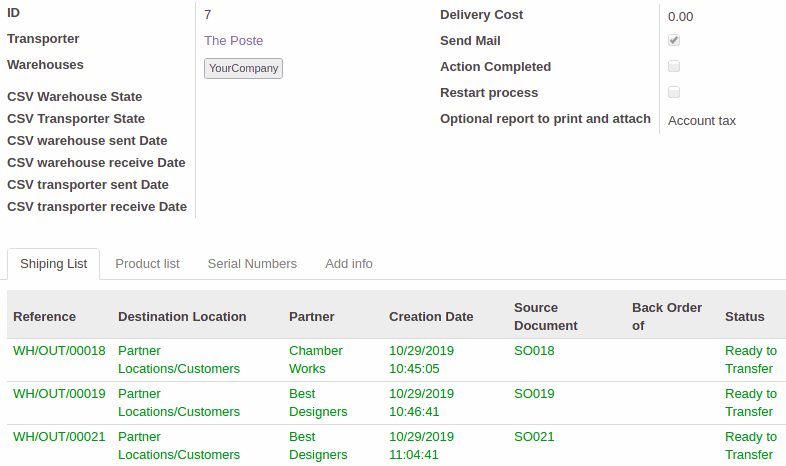
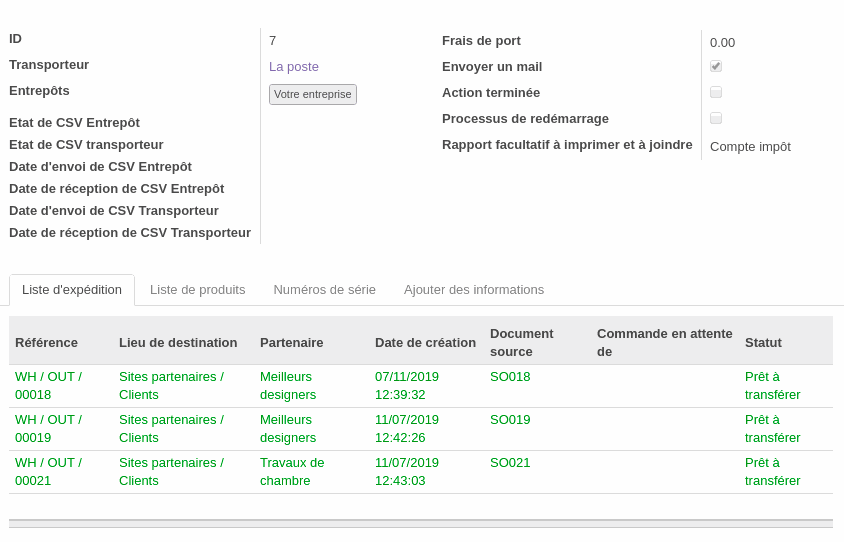
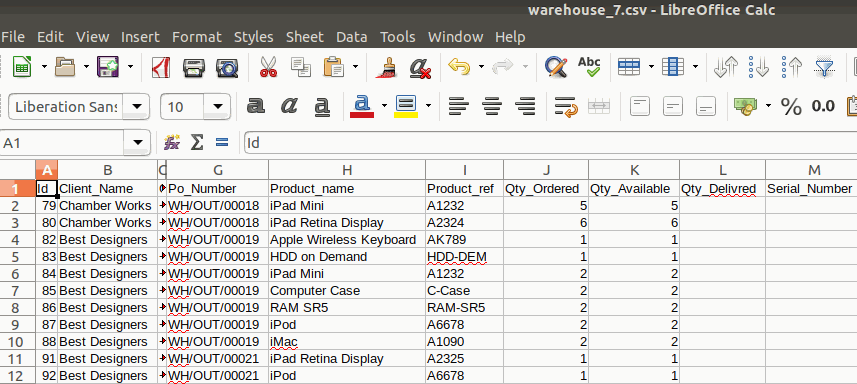
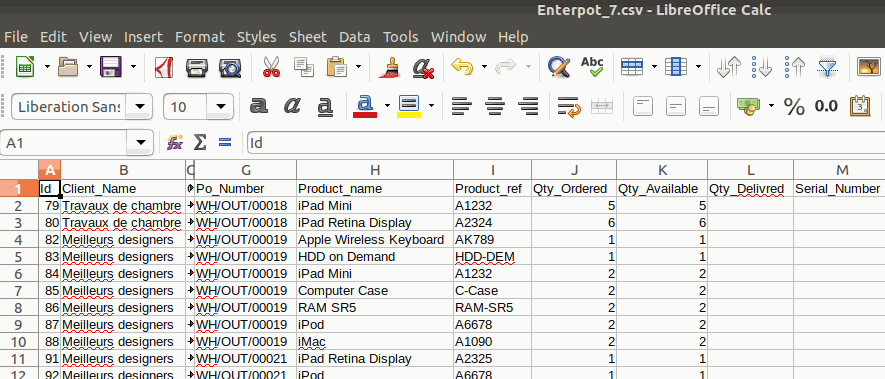
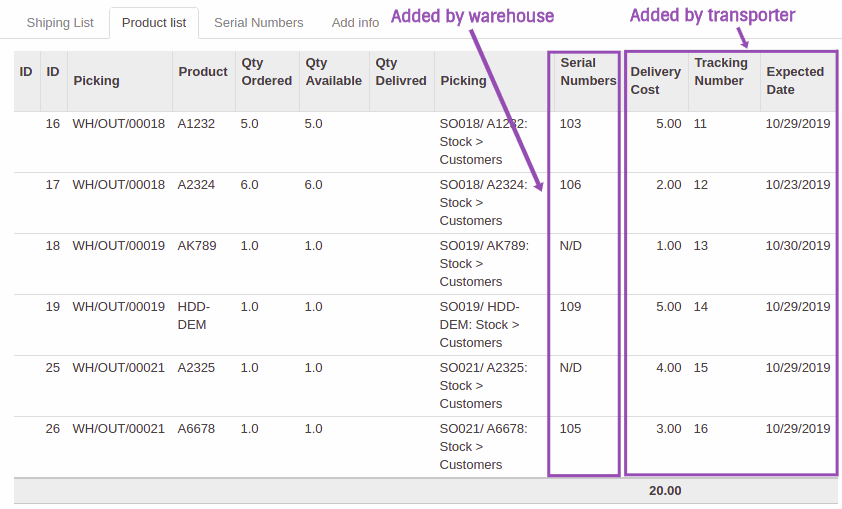
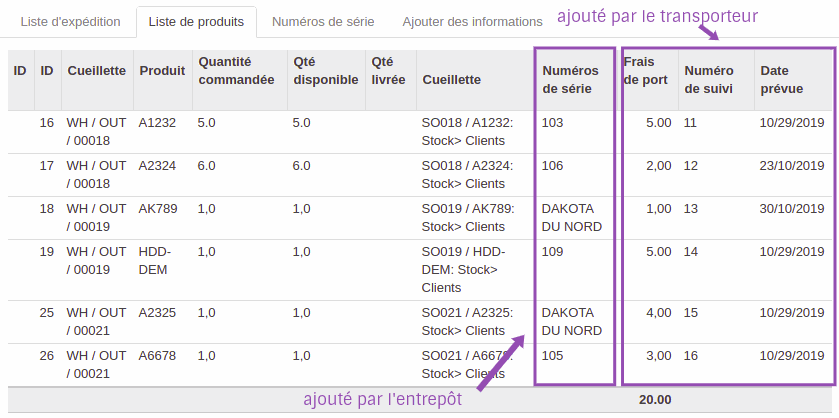
- As mentioned before, the odoo server uses an FTP connection to send CSV files to the warehouse service, and the transporter service. To see the CSV file generated by this operation click on the button "Preview CSV". This is the contents of this CSV file:
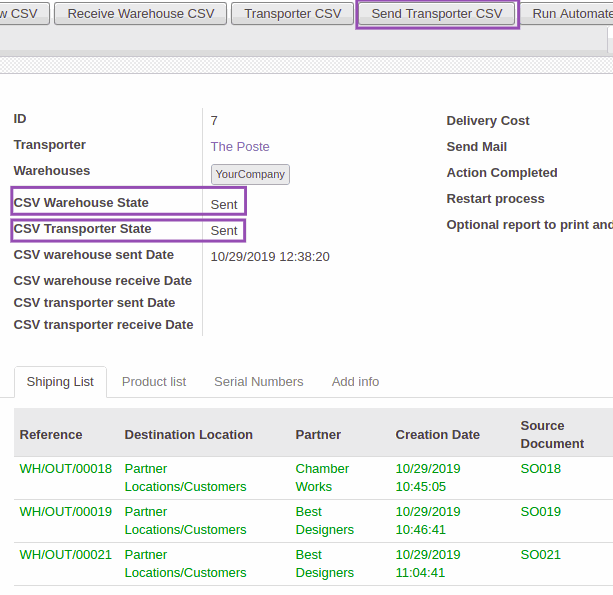
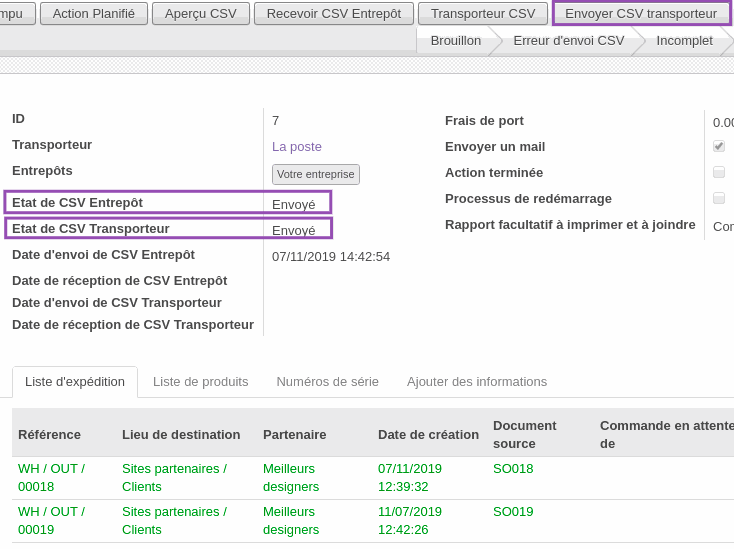
- Cliquez sur "Envoyer CSV Transporteur" pour envoyer ce document au serveur de transporteur et au serveur d'entrepôt.
Si l'envoi réussit, la valeur des champs "Etat dE csv Entrepôt" et "Etat de CSV transporteur " sera remplacée par "Envoyé" et l'état de l'ensemble de l'opération passera à "Envoi CSV".
-
When the warehouse service receives the csv file, they will make some changes on it (adding the serial number, delivery date, ...).
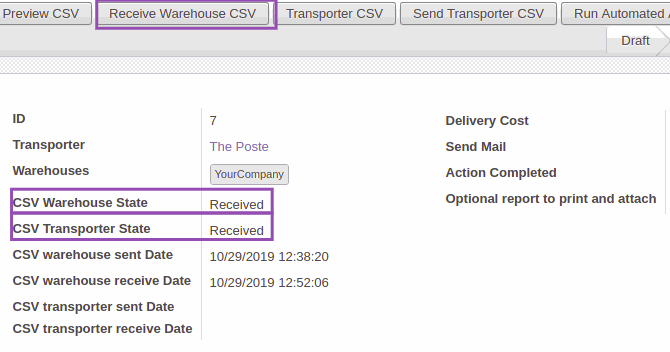
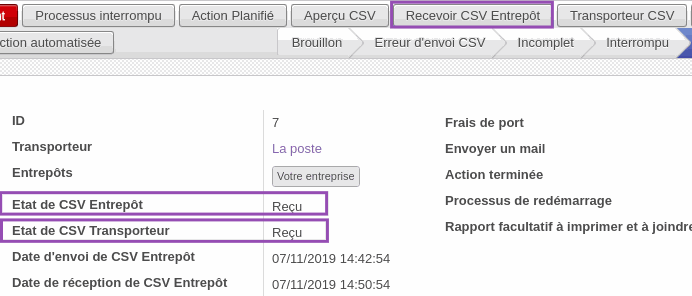
When this change is complete, click the "Receive Warehouse CSV" button. This will import the modified file from the warehouse FTP server.
Si l'importation réussit, la valeur du champ "Etat de CSV Entrepôt" deviendra "Reçu".
The odoo server will use these modifications of the csv files to modify the corresponding deliveries.
The same thing for the transporter service.
Si les deux champs "Etat de CSV Entrepô" et "Etat de CSV Transporteur" sont reçus, l'état de l'ensemble de l'opération est alors transmis à "CSV reçu".
- After receiving CSV files, you can transfer all the deliveries related to this operation to the customer by clicking on the "Transfer" button.
- After the transfer the operation status will be changed to "done", and the state of all deliveries become "Transferred".
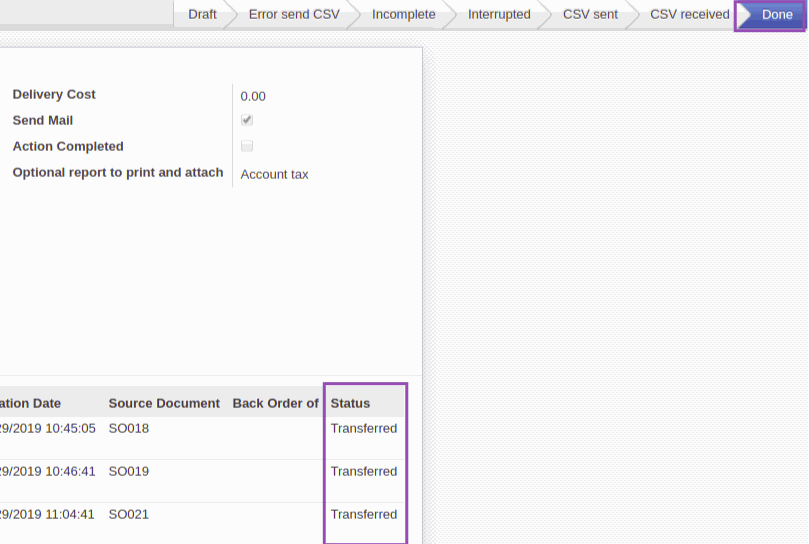
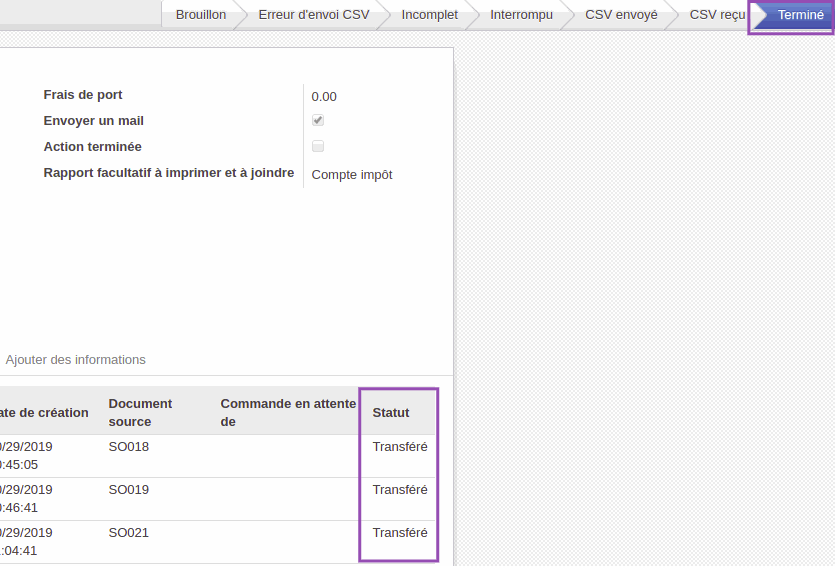
- Also you can send an email to the customer to notify him that his deliveries is processed by clickin on the button "send mail". It will inform him of the products he will receive and the transporter who will deliver them. This is useful in case all deliveries have the same customer.
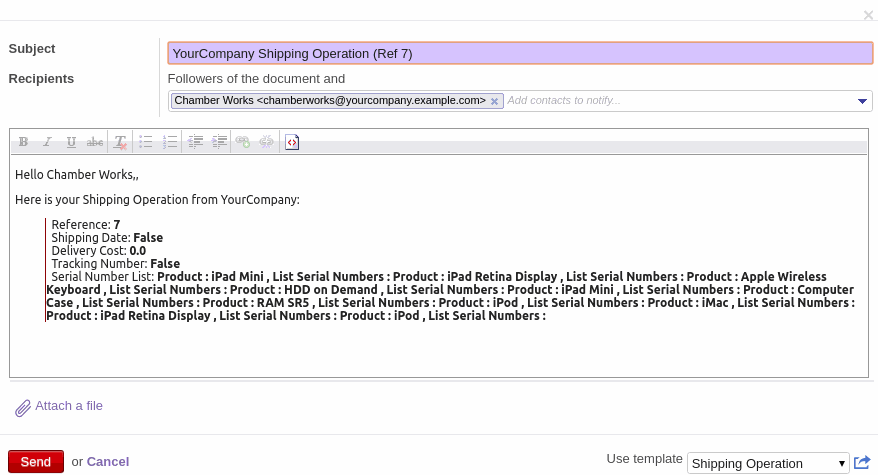
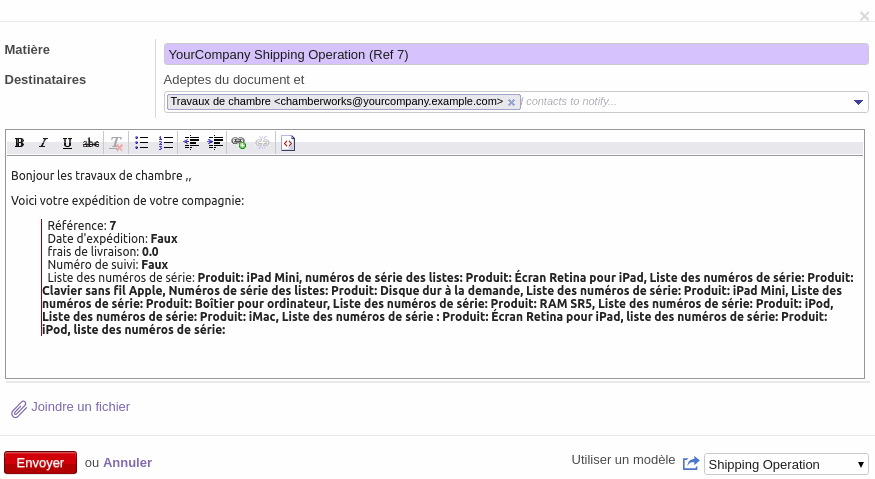
-
The process is the same for suppliers and reception orders.